Table of Contents
From the user profile you can access account settings and default creative commons settings.
In account settings you can make edits to your name, e-mail, organization you are affiliated with, bio, and change your profile picture.
From account settings you can access change your password, delete your account and make changes to your default creative commons settings.
Account Settings
In account settings we will go over how to edit your first and last name, e-mail address, organization name, bio and changing your profile picture. We will also cover how to change your password and how to delete your account.
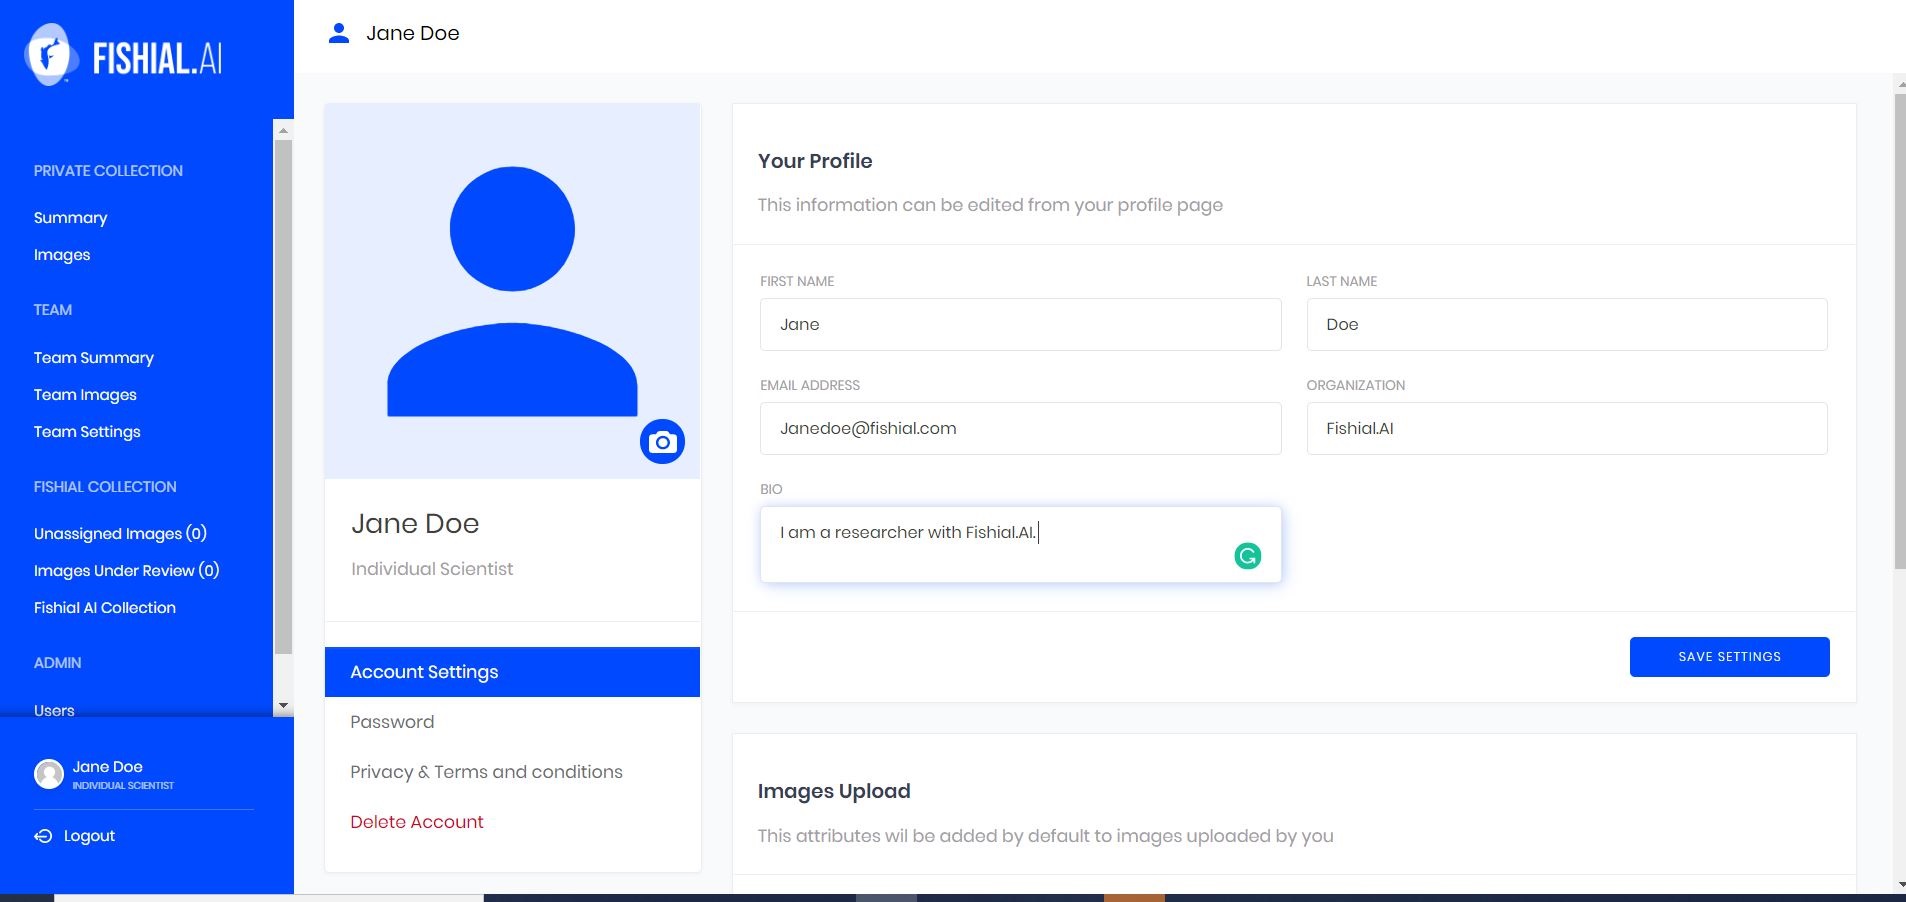
You can access your account settings by selecting on your name in the far left blue menu, your name will be on the bottom of the screen, just above the logout button. Click on your name and your account settings will open up. The account settings screen will look like below.
How to Edit Your First and Last Name
Type your first name and last name in the text boxes for first and last name, as seen below.
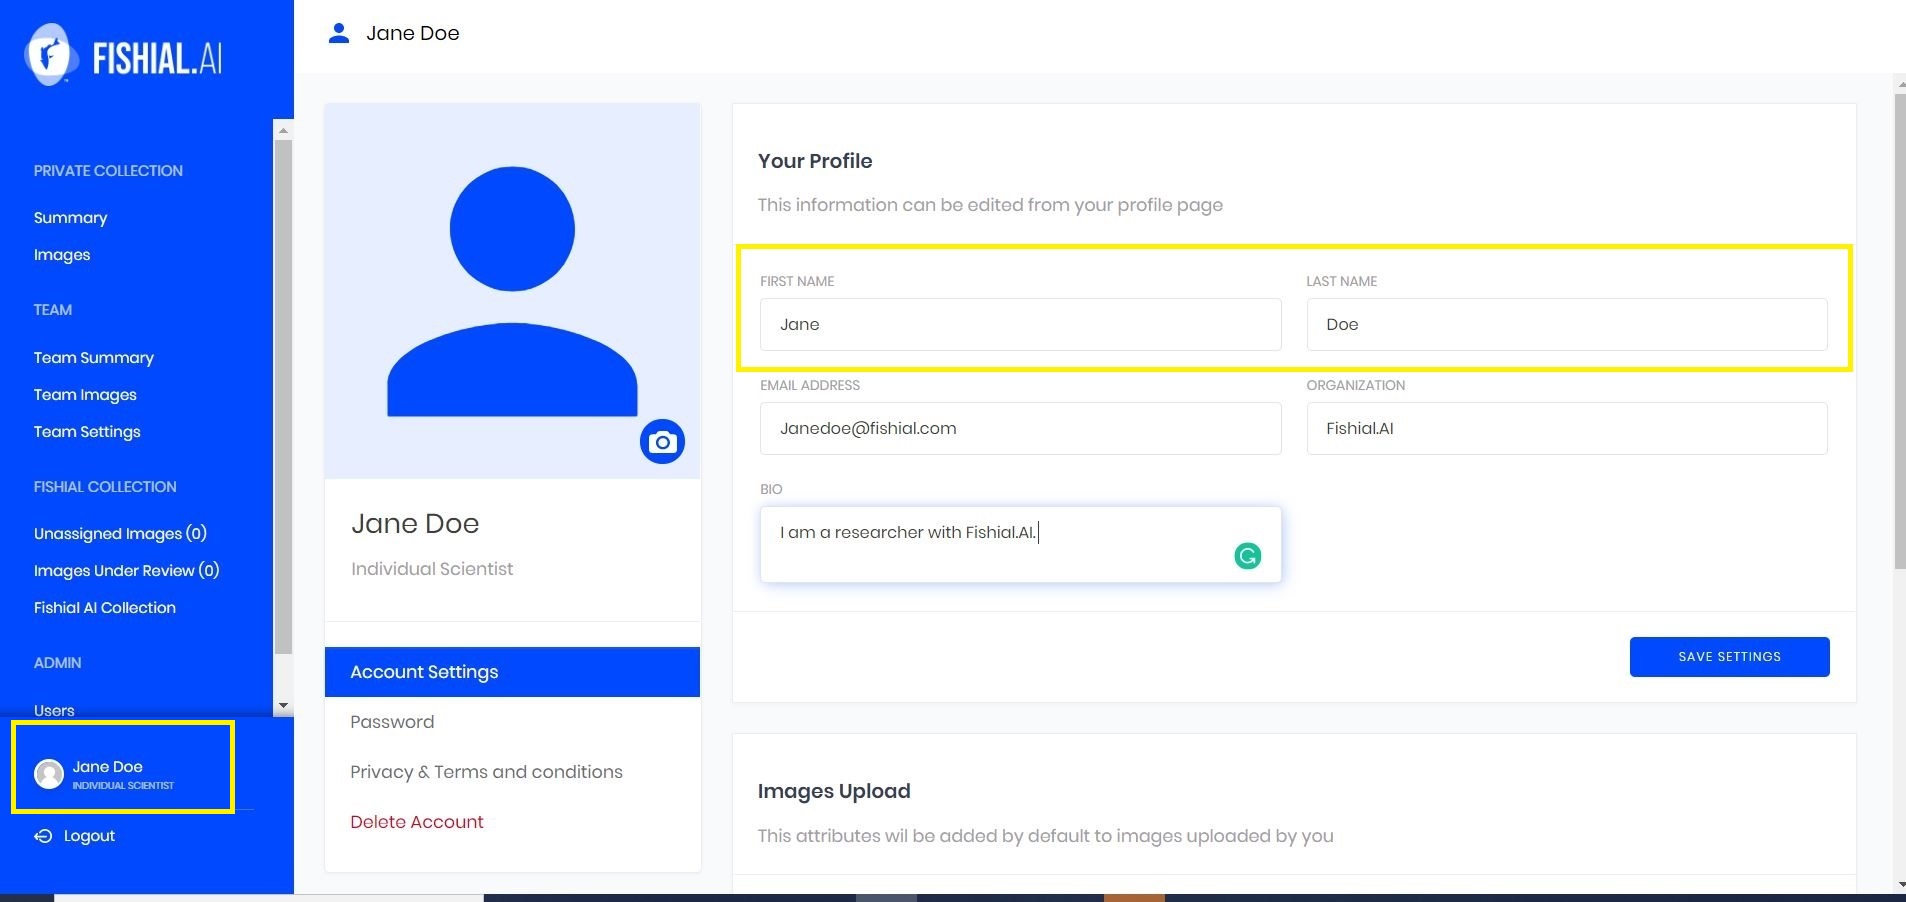
Click on the blue save button to save the edits you have made.
How to Edit Your E-mail Address
Type the new e-mail address that you want have associated with the Fishial.AI portal in the e-mail text box, as seen below.
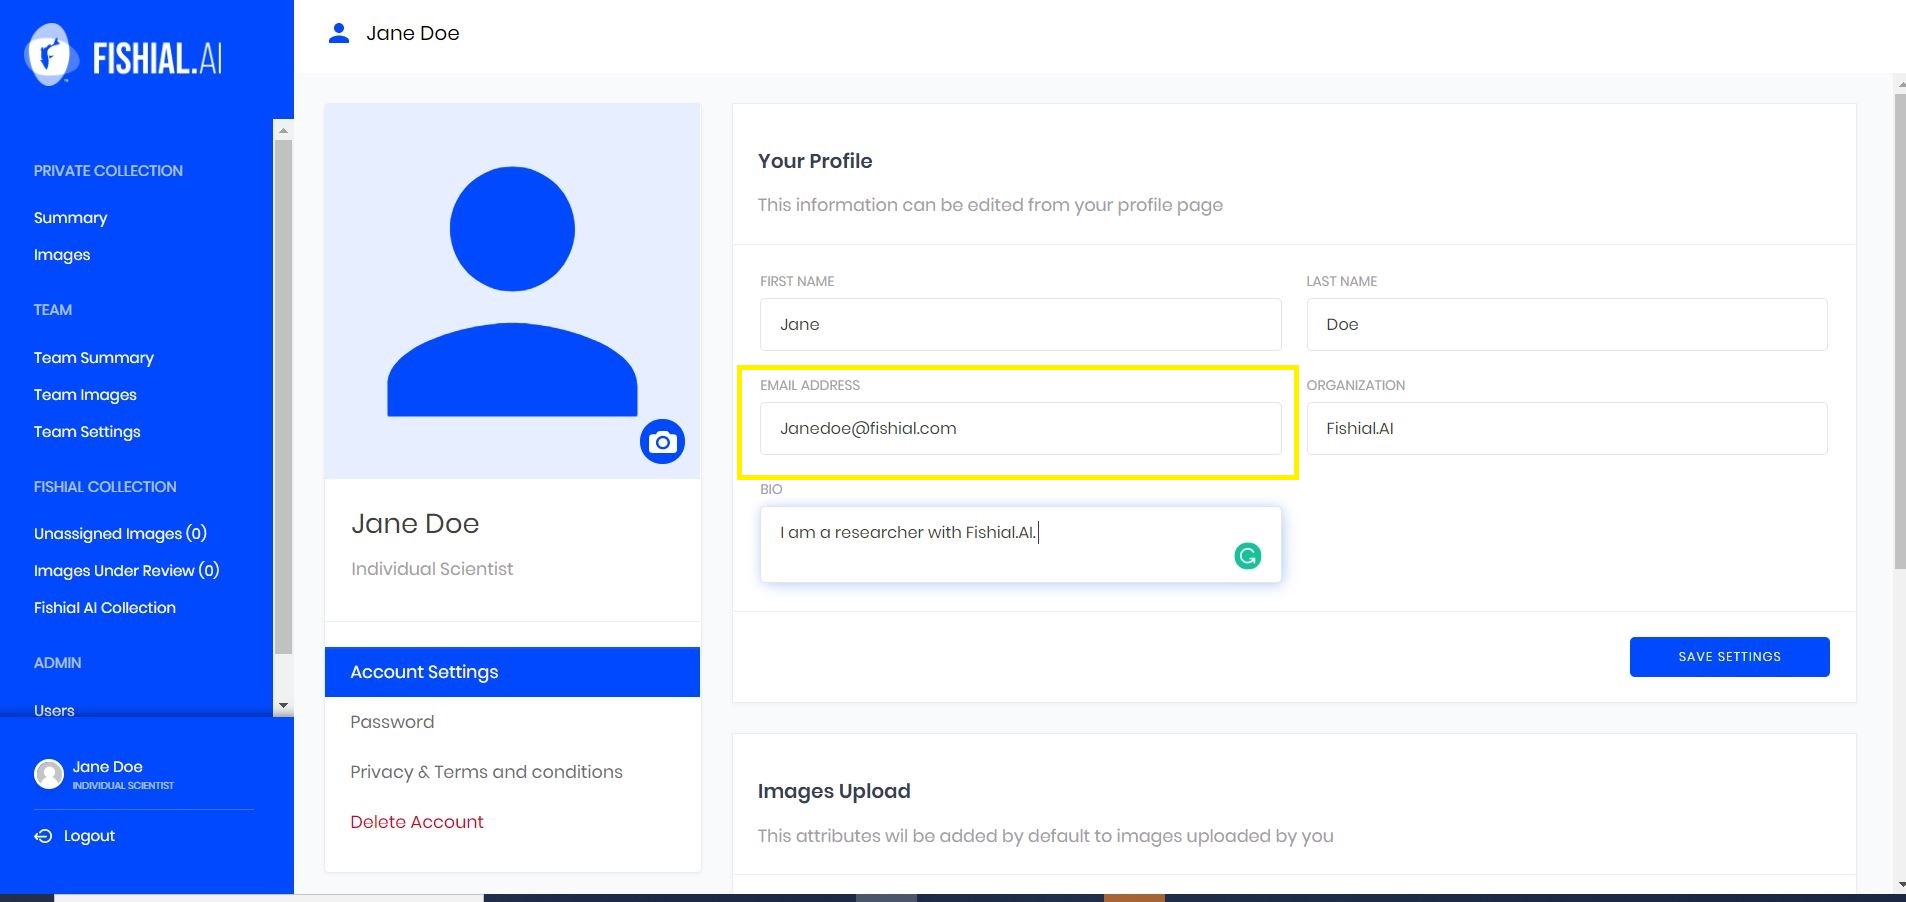
Click on the blue save button to save the edits you have made.
How to Edit Your Organization Name
If you are affiliated with an organization and you wish to add that information to your profile you can add it by typing the name of the organization in the organization text box, as seen below.
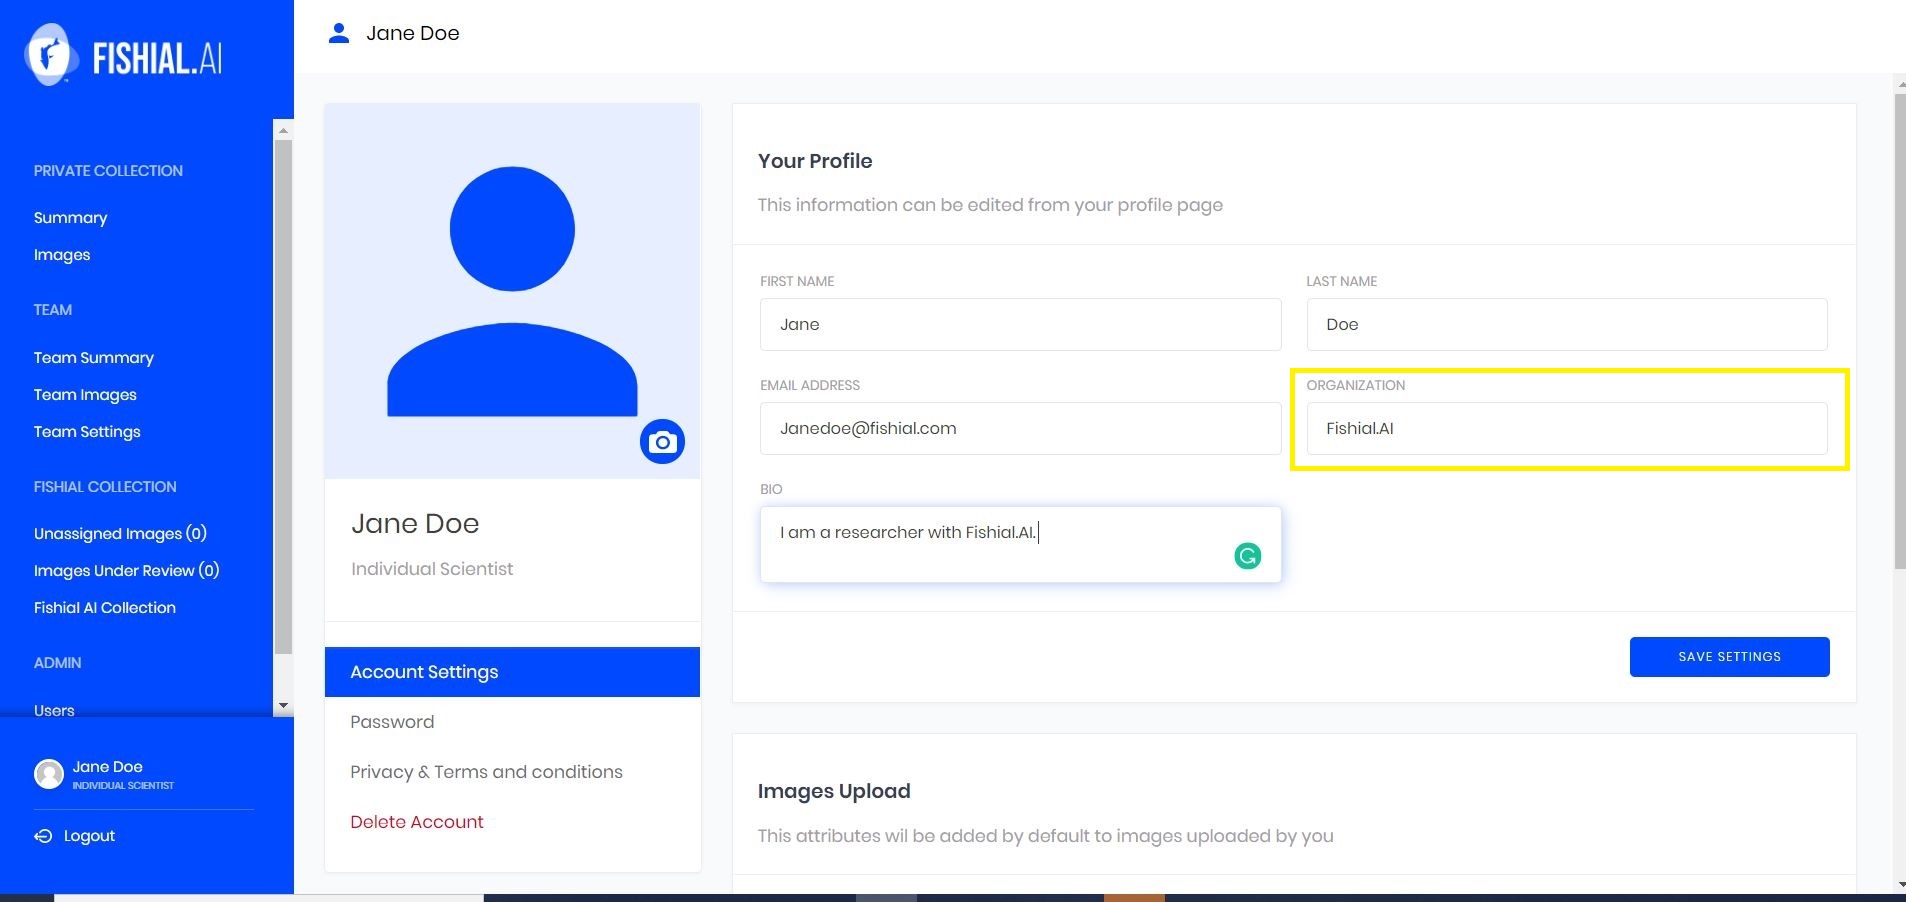
Click on the blue save button to save the edits you have made.
How to Change Your Profile Picture
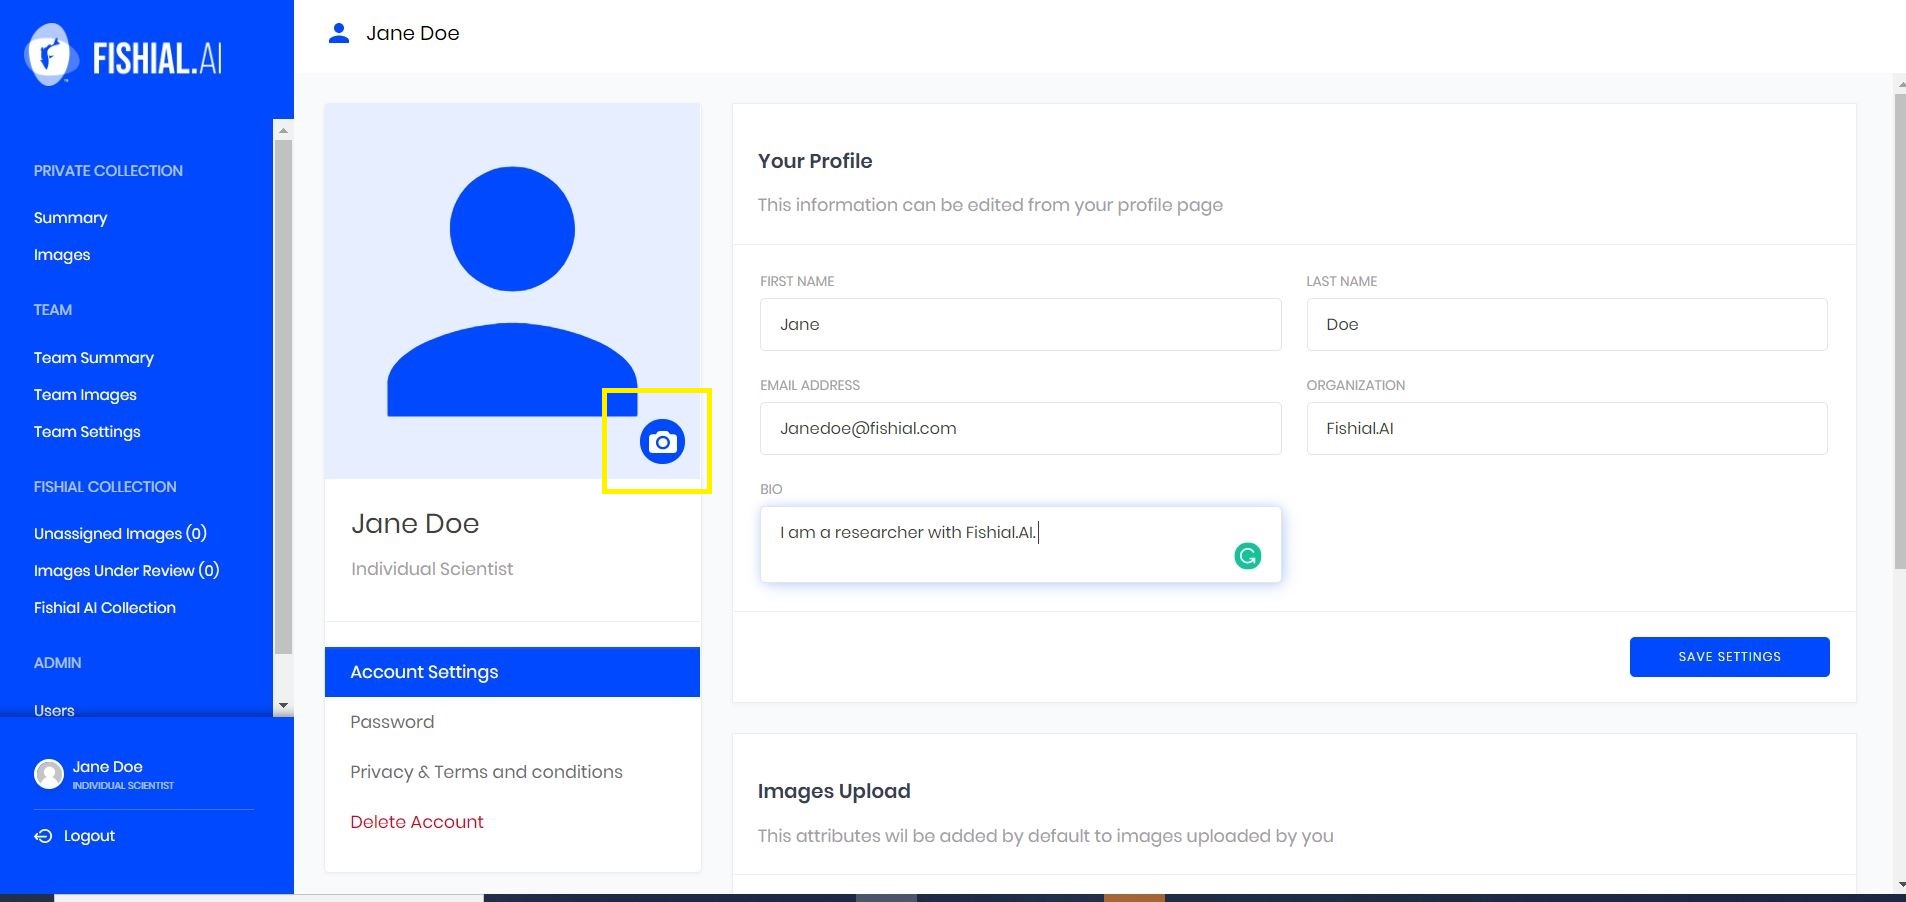
To change your profile picture click on the small blue and white camera in the bottom right corner of the profile picture thumbnail. As seen below outlined in yellow.
This will open up a file window where you will be able to choose an image from your files that you wish to be your profile picture, as seen below.
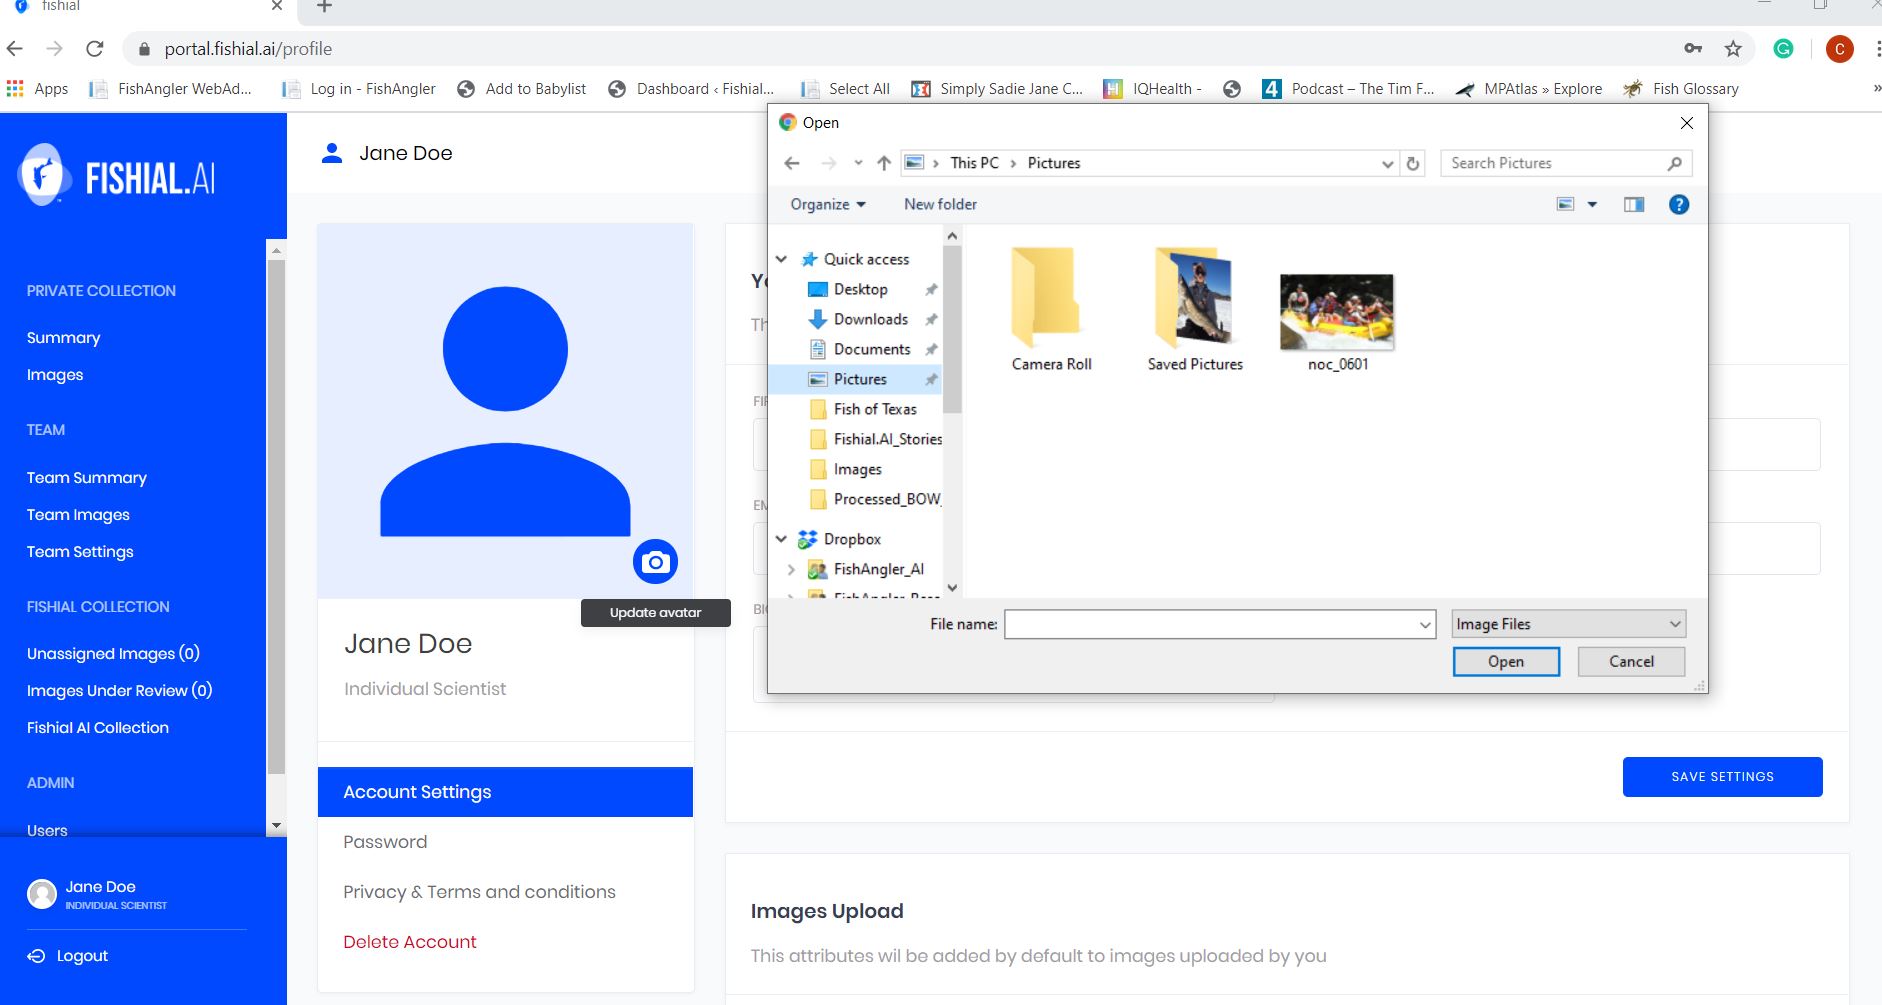
Once you have selected your image click on open in the file window to open the image to the profile picture thumbnail. Finally, click on the blue save button to save your changes.
How to Change Your Password
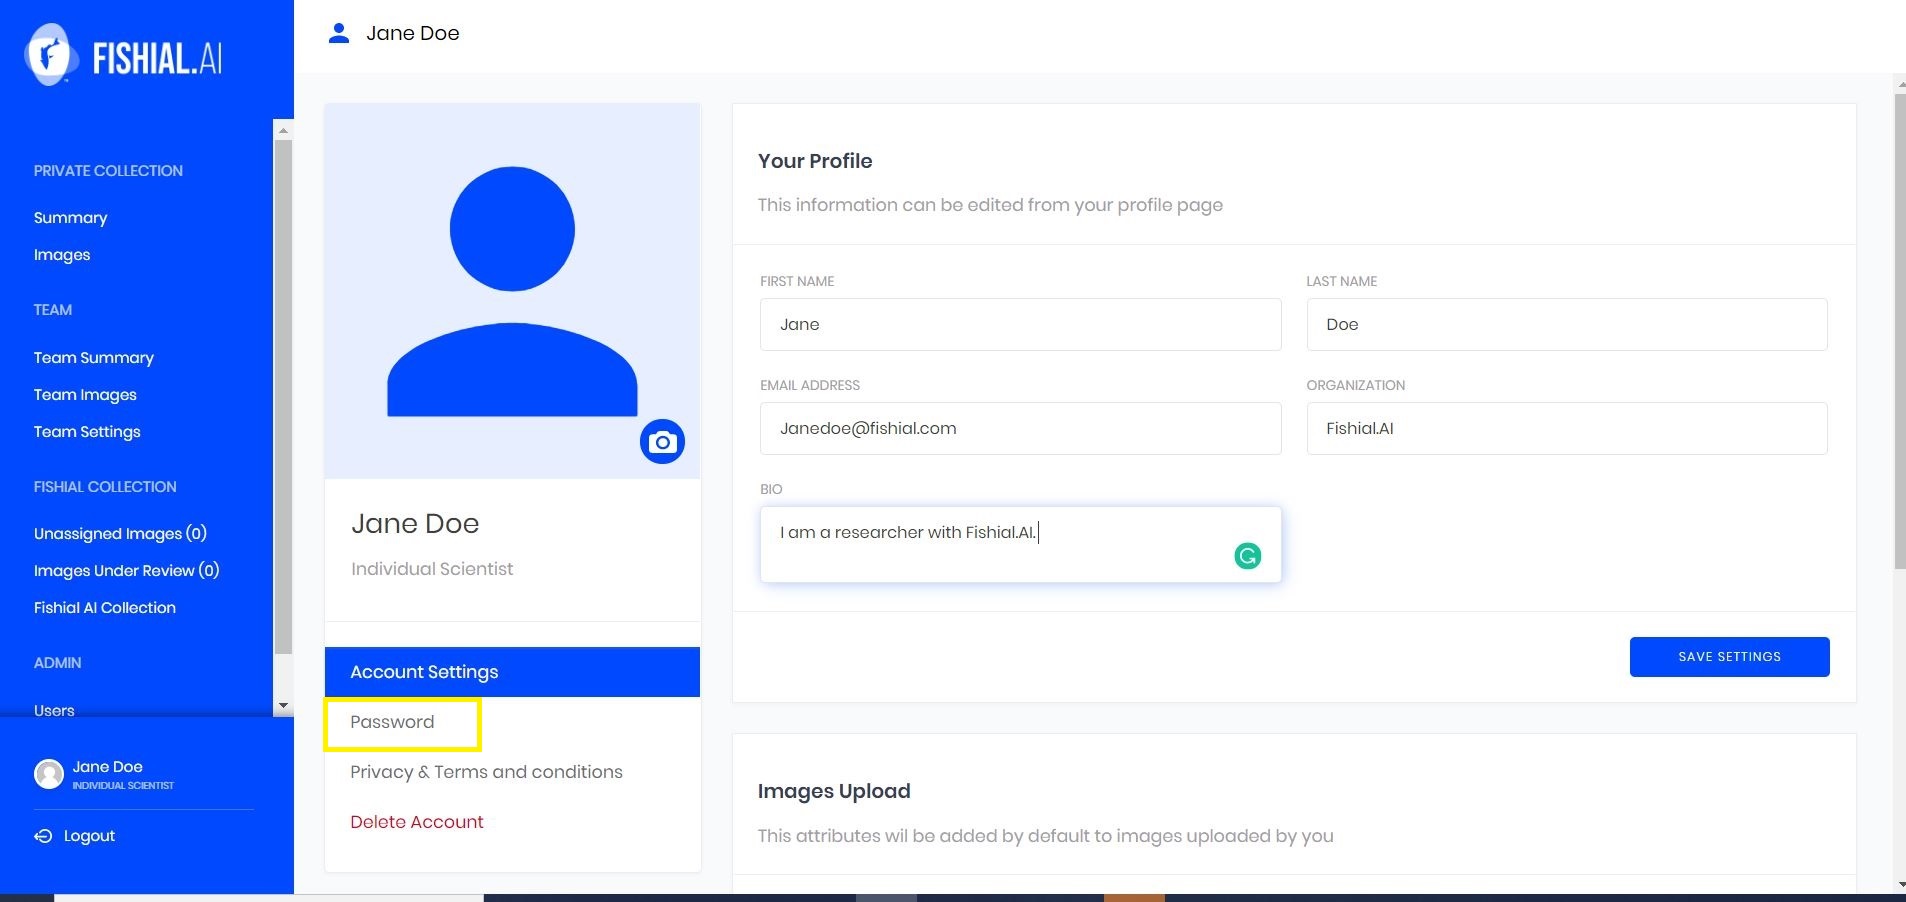
You can access your password settings from account settings. From account settings click on "password", which is right below "account settings", as seen below outlined in yellow.
Enter a new password that you will remember in the "new password" text box, as seen below.
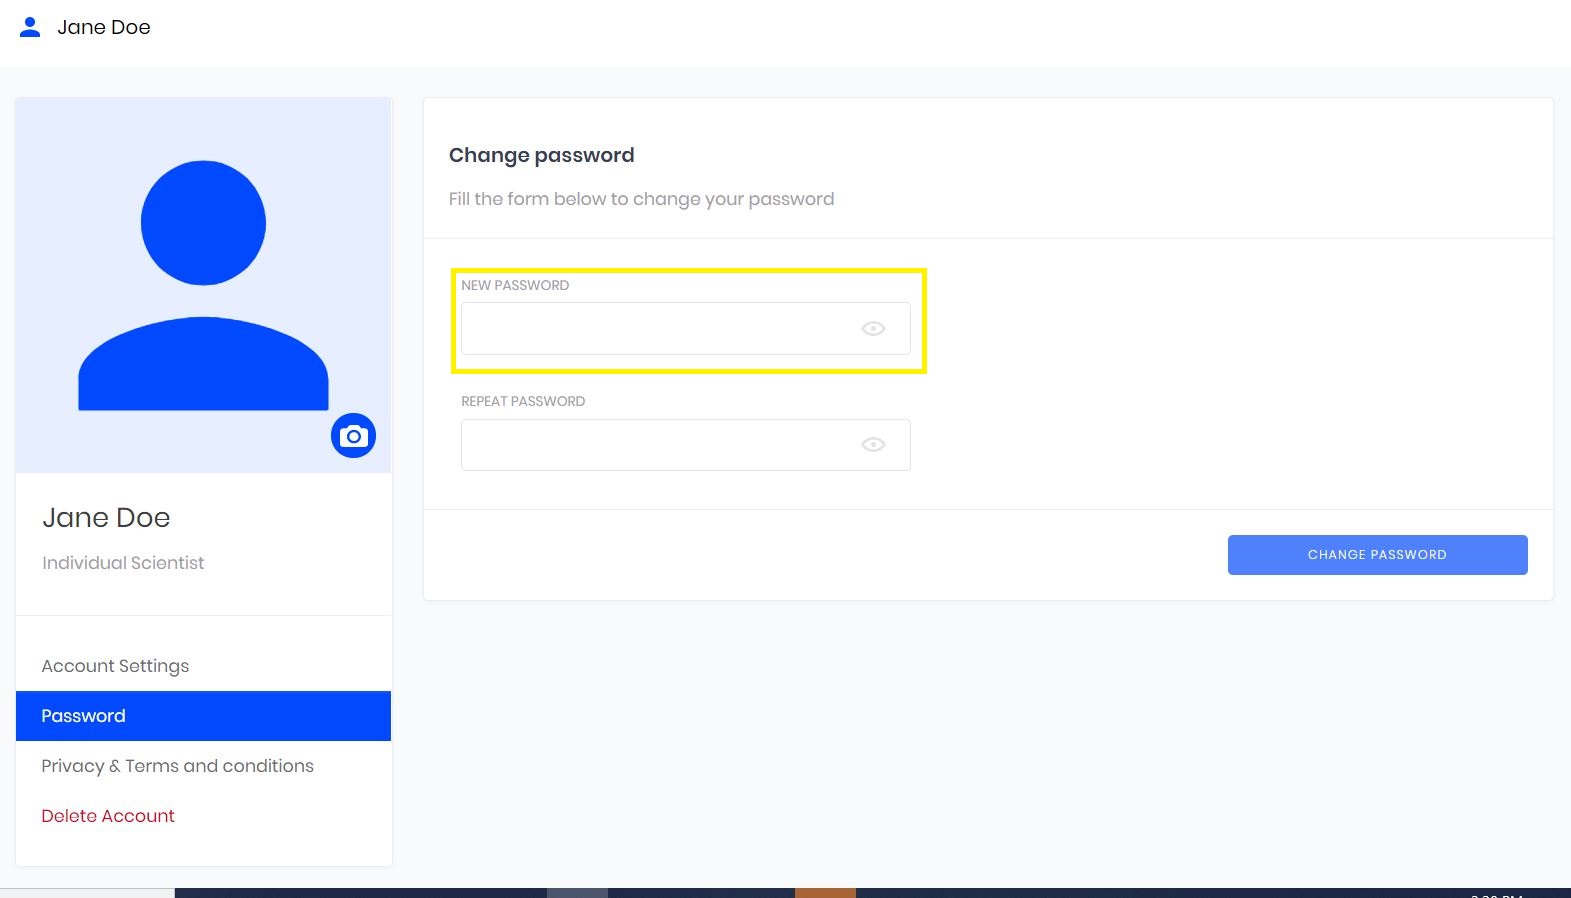
Repeat this same password in the "repeat password" text box, as seen below.
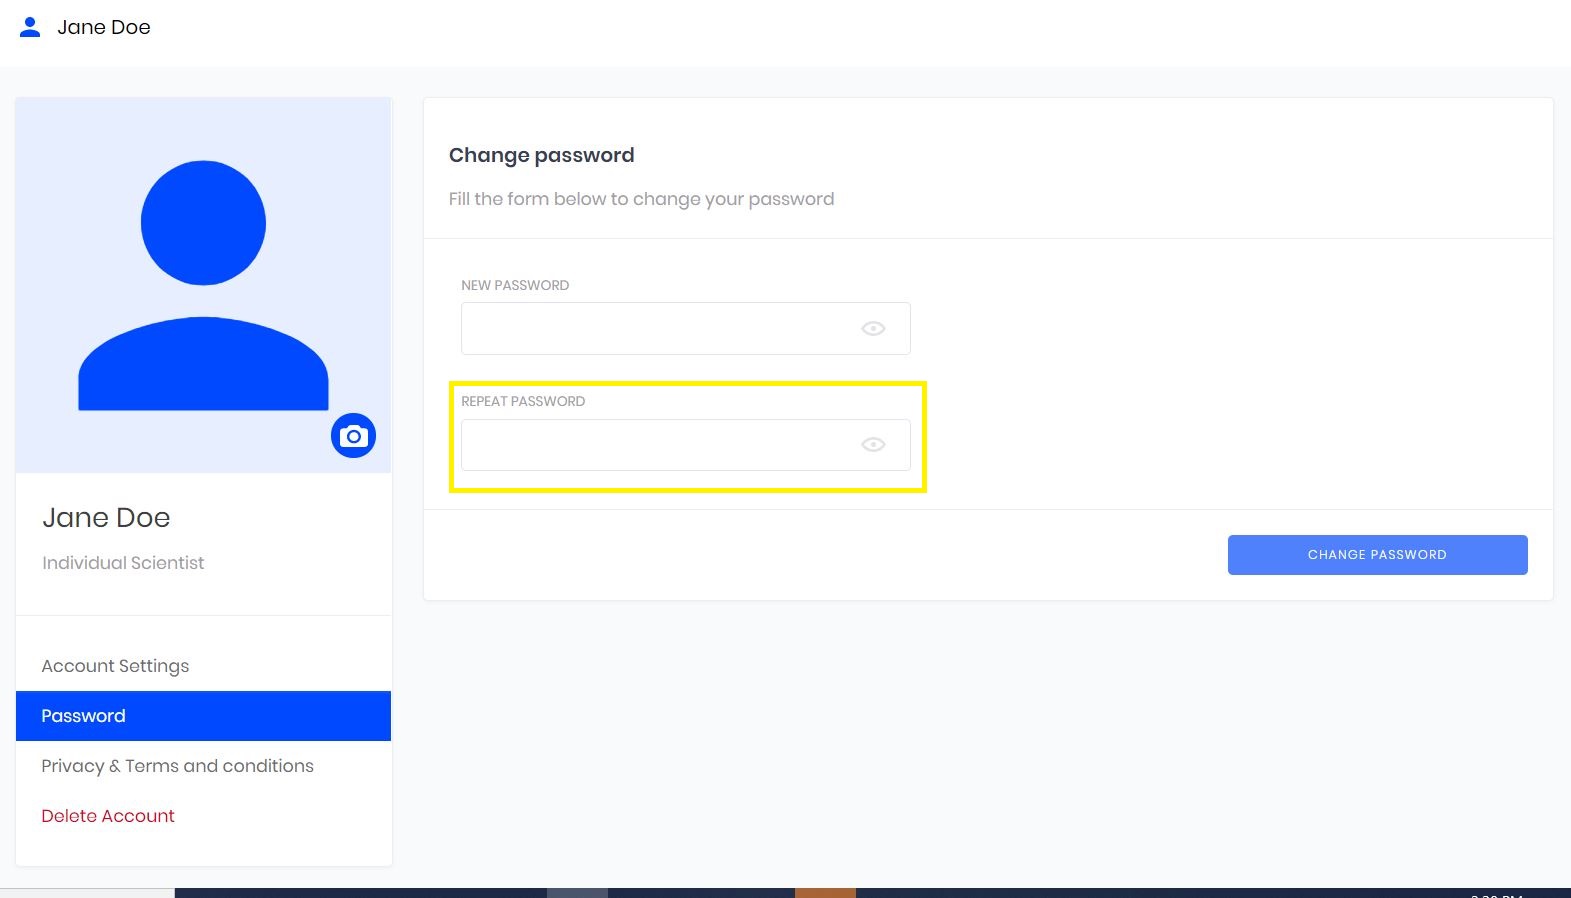
To save your new password click on the blue "change password" button, as seen below.

How to Delete Your Account
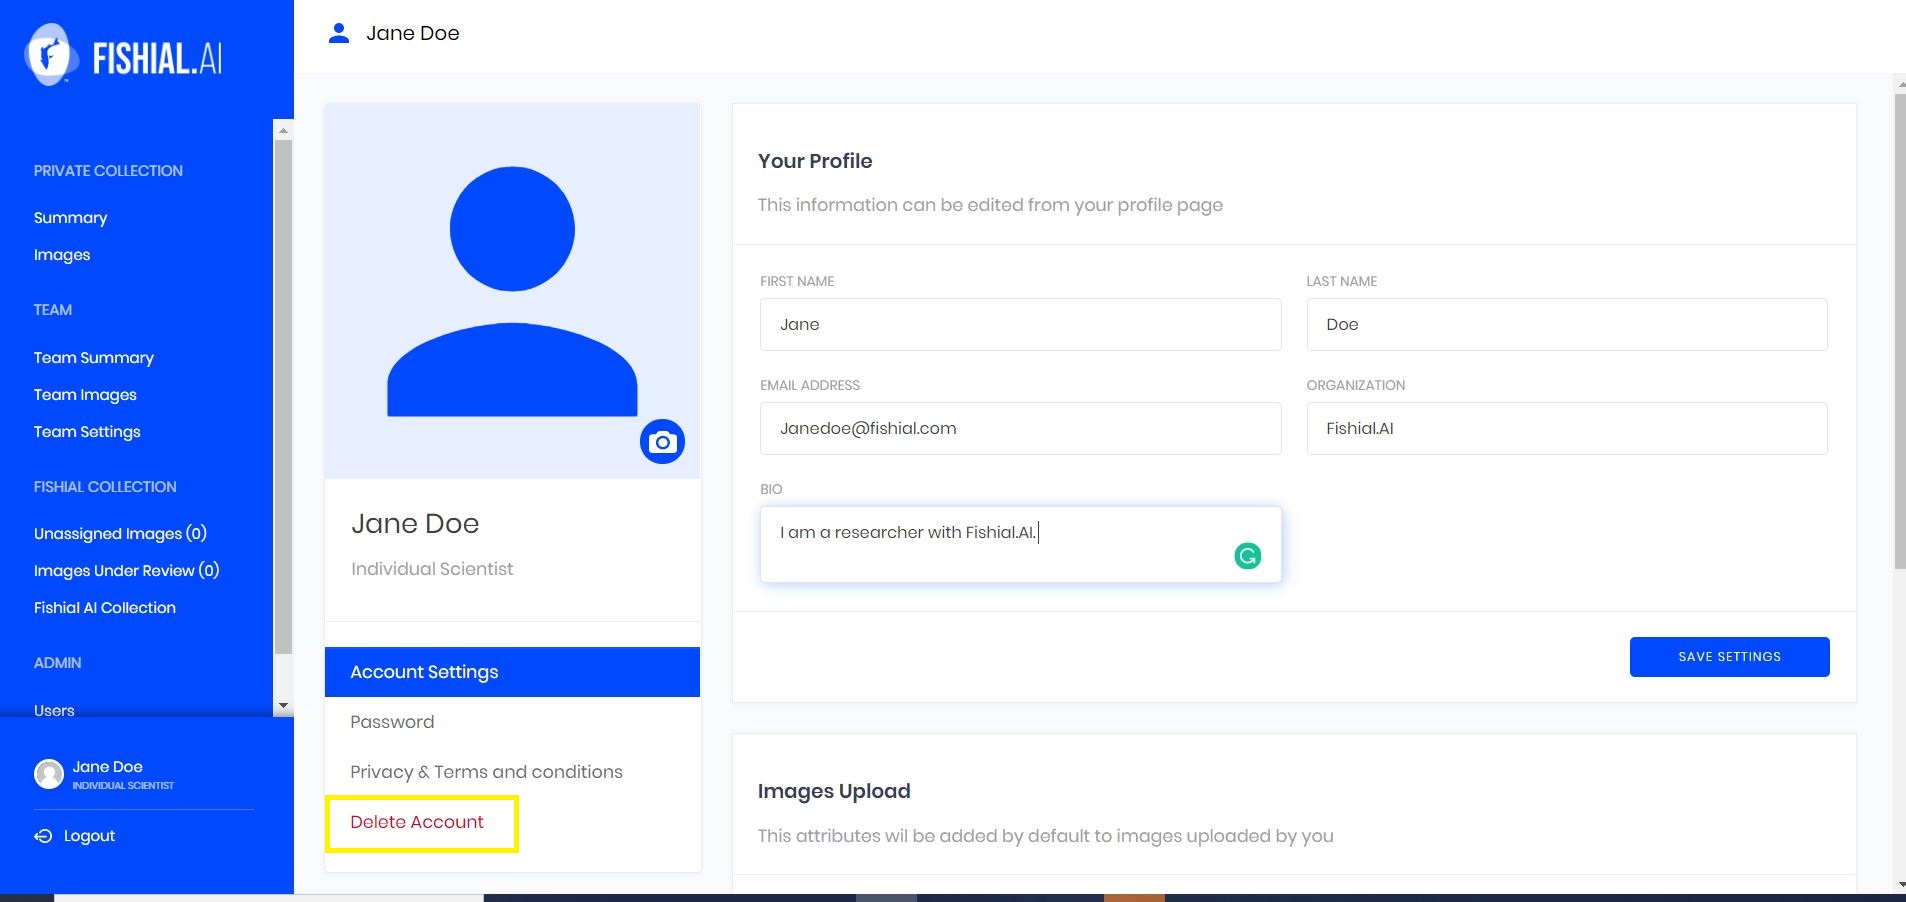
You can access "delete account" from account settings. From account settings, click on "Delete Account", it is in red type. As seen below outlined in yellow.
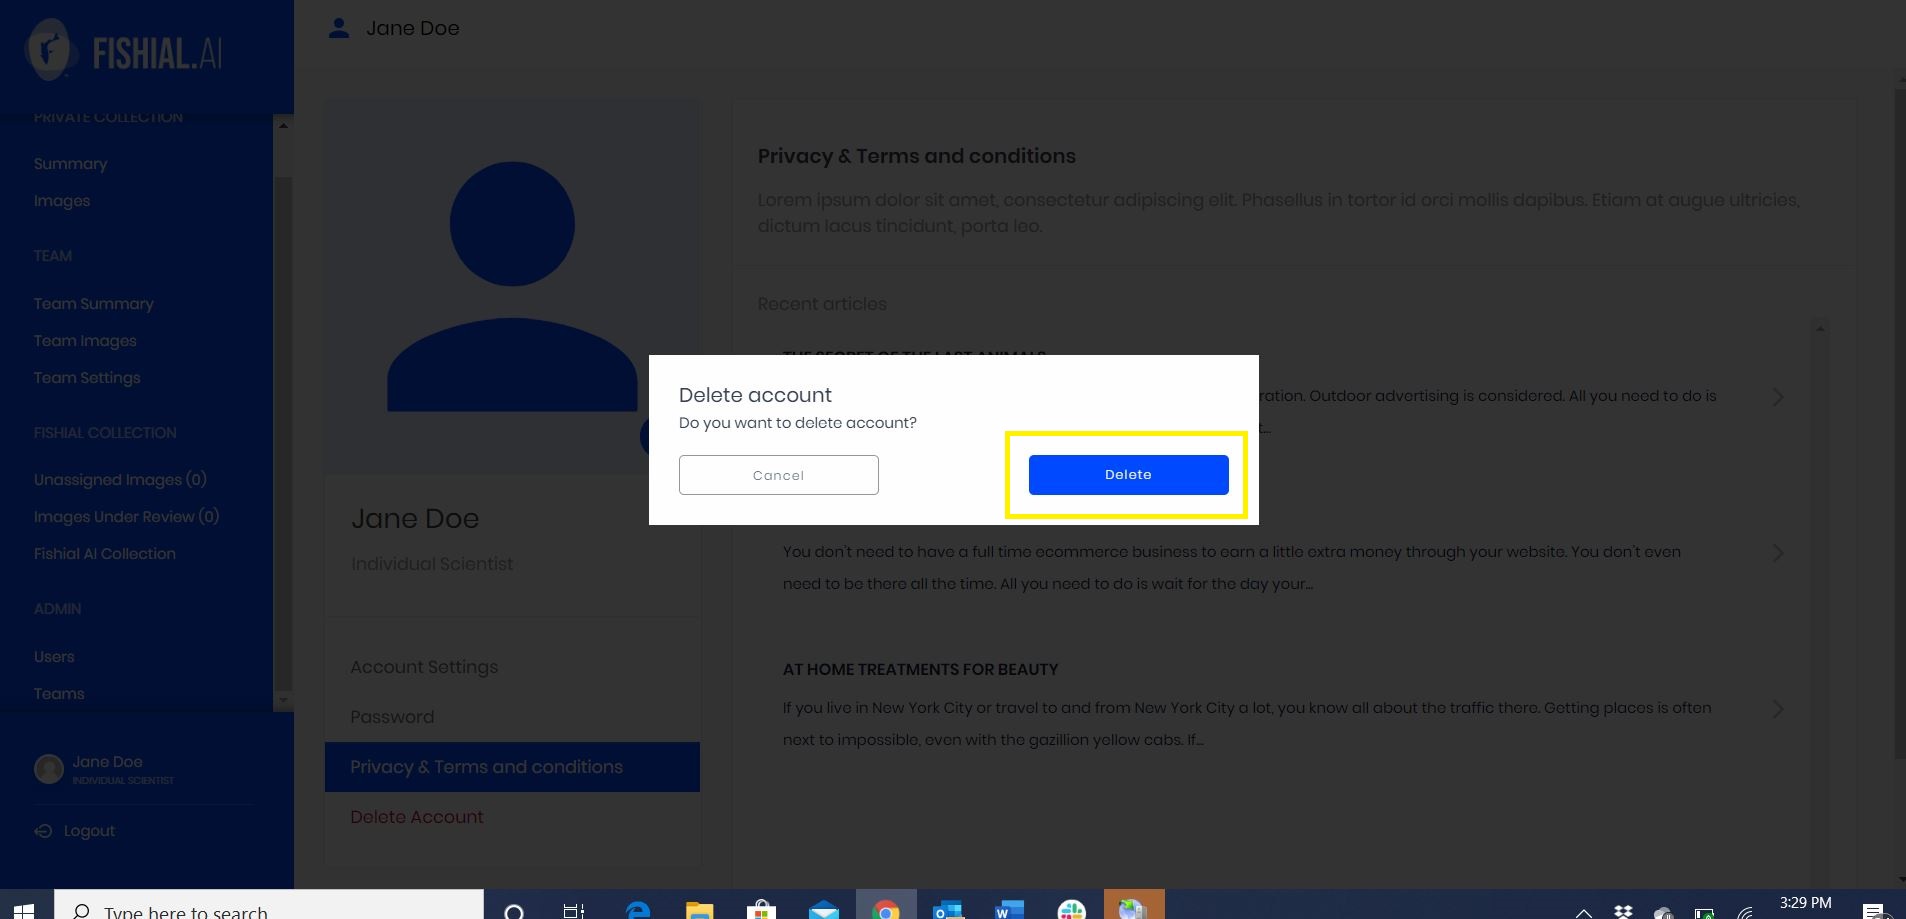
A pop-up will show on the screen asking you if you want to delete your account. Click on the blue "delete" button to delete the account, as seen below outlined in yellow.
Default Creative Commons Settings
The default creative commons settings allows you to set a standard creative commons to be added to every image automatically when you upload them. This is an optional setting.
Here we will walk you through the steps to set up your default creative commons settings.
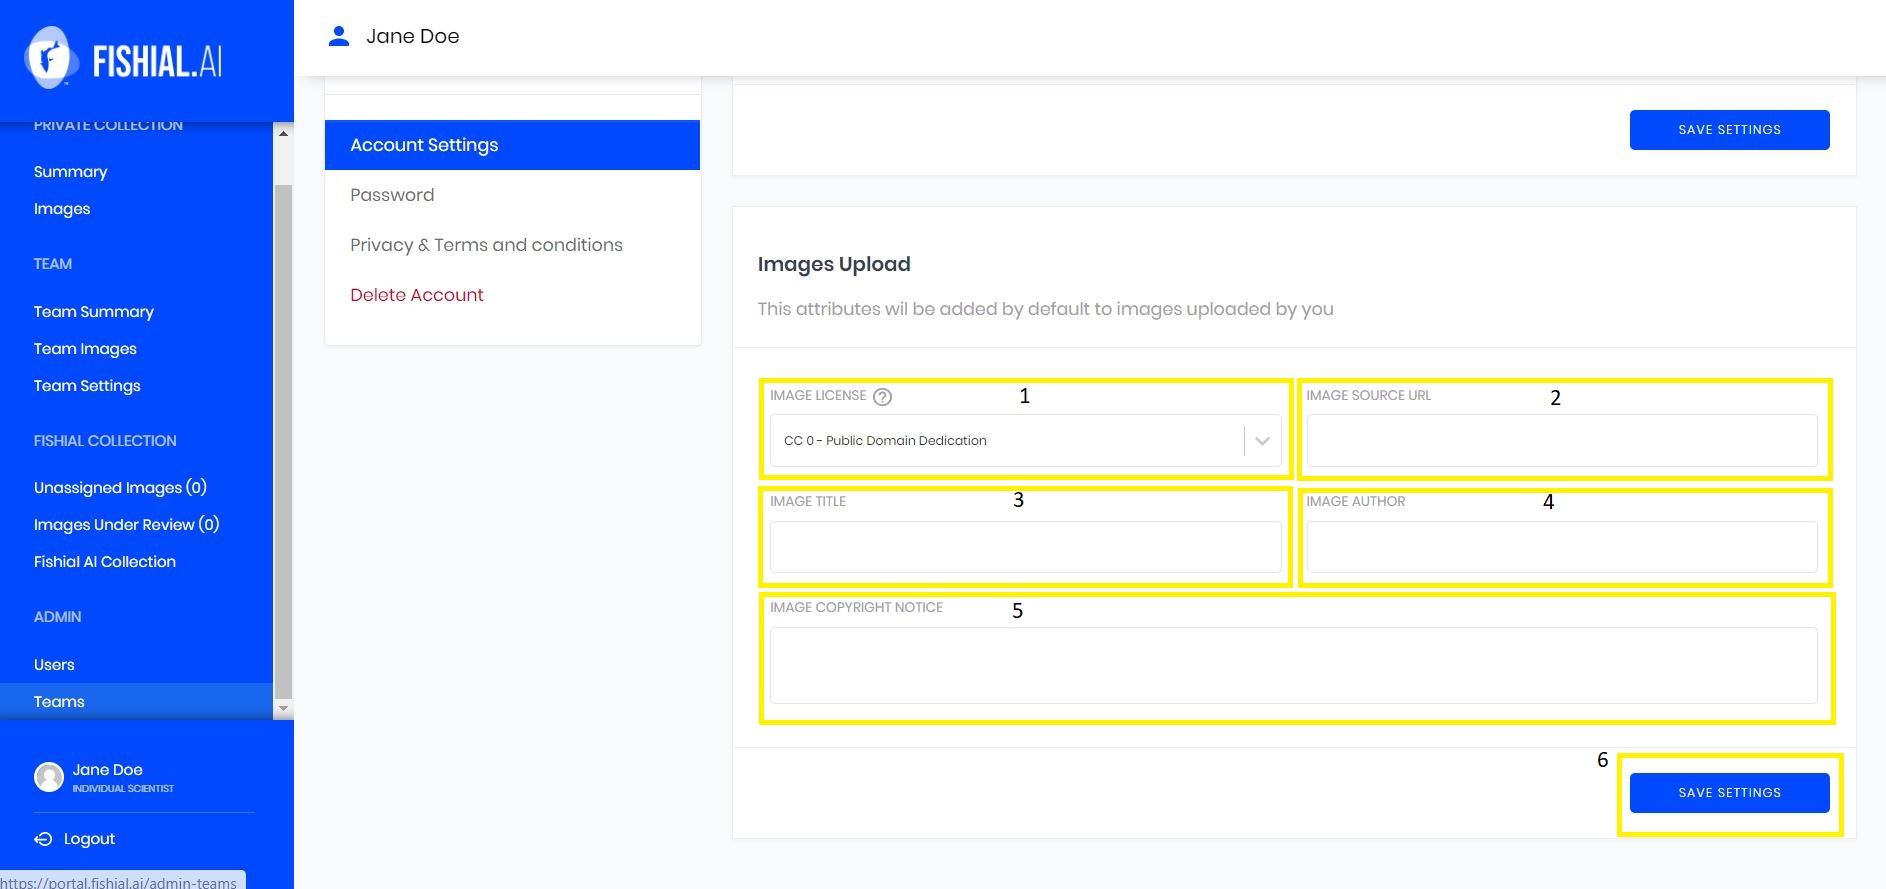
You can access the default creative commons settings from account settings and scrolling down.
Supported Fields
-
To change the image license, select the type of image license from "image license" drop down menu. This will be the default image license for every image you upload. See box 1 in the image above.
-
To change the image source URL for all of the images you upload, type the image source URL in the image source URL text box, as seen below. See box 2 in the image above.
-
If you wish for all of your images that you upload to have the same title, type the title you wish to use in the "image title" text box, as seen below. See box 3 in the image above.
-
If you wish for all of your uploaded images to have the same image author, type the authors name in the image author text box, as seen below. See box 4 in the image above.
-
If you wish for all of your images to have the same copyright notice type the copyright notice you wish to use in the "image copyright notice" text box, as seen below. See box 5 in the image above.
-
To save any of the changes you have made click on the blue "save settings" button, as seen below. See box 6 in the image above.